How to Create `SuperAdmin` user
The SuperAdmin user is an IAM user created for cold start bootstrapping and emergency break-glass access only. This guide outlines the steps to create a secure SuperAdmin user in AWS, including setting permissions, enabling MFA, and storing credentials safely in 1Password.
About SuperAdmin
The SuperAdmin user is a break-glass IAM user intended for two scenarios:
- Cold start bootstrapping — Initial account setup before IAM Identity Center is configured
- Emergency IdP failure — When your Identity Provider is completely unavailable and you cannot authenticate via IAM Identity Center
After cold start is complete, prefer these alternatives:
| Scenario | Recommended Approach |
|---|---|
| Administrative tasks in a specific account | Use AdministratorAccess Permission Set for that account |
| Organization-level or emergency administrative tasks | Use Centralized Root Access via the RootAccess Permission Set |
| Emergency access (IdP down) | SuperAdmin (this is the only valid use case post-cold-start) |
Because SuperAdmin is an IAM user with static credentials, there is no audit trail for who used the credentials—all access appears as the same user. Permission Sets provide per-user audit trails via CloudTrail, making them the preferred option whenever your IdP is available.
Follow the prerequisites steps in the How-to Get Started guide
1 Create the SuperAdmin User
First, create the SuperAdmin IAM user in the AWS web console.
-
Login to the AWS
rootaccount using the root credentials. -
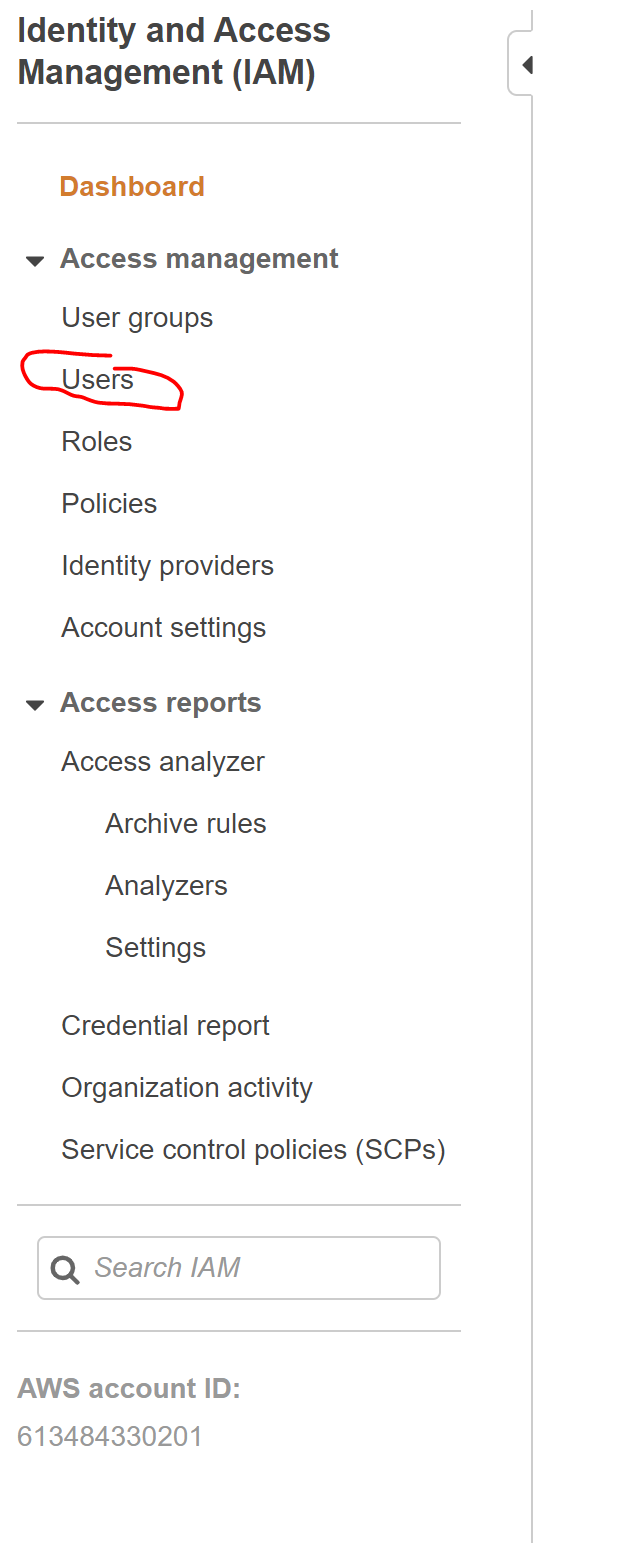
In the IAM console, select "Users" on the sidebar.

-
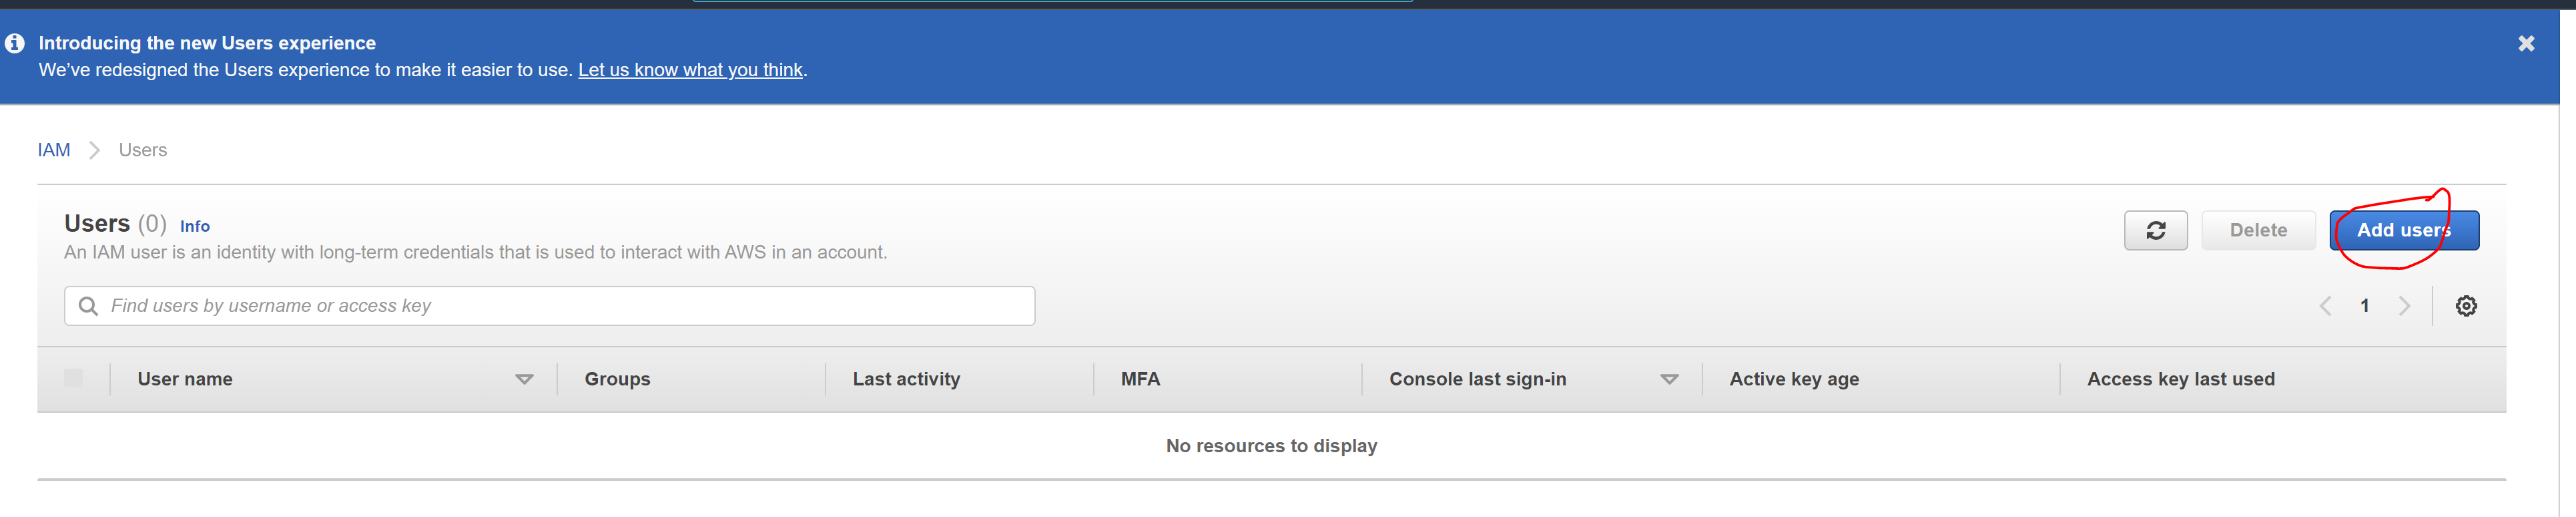
Click "Add users" button
-
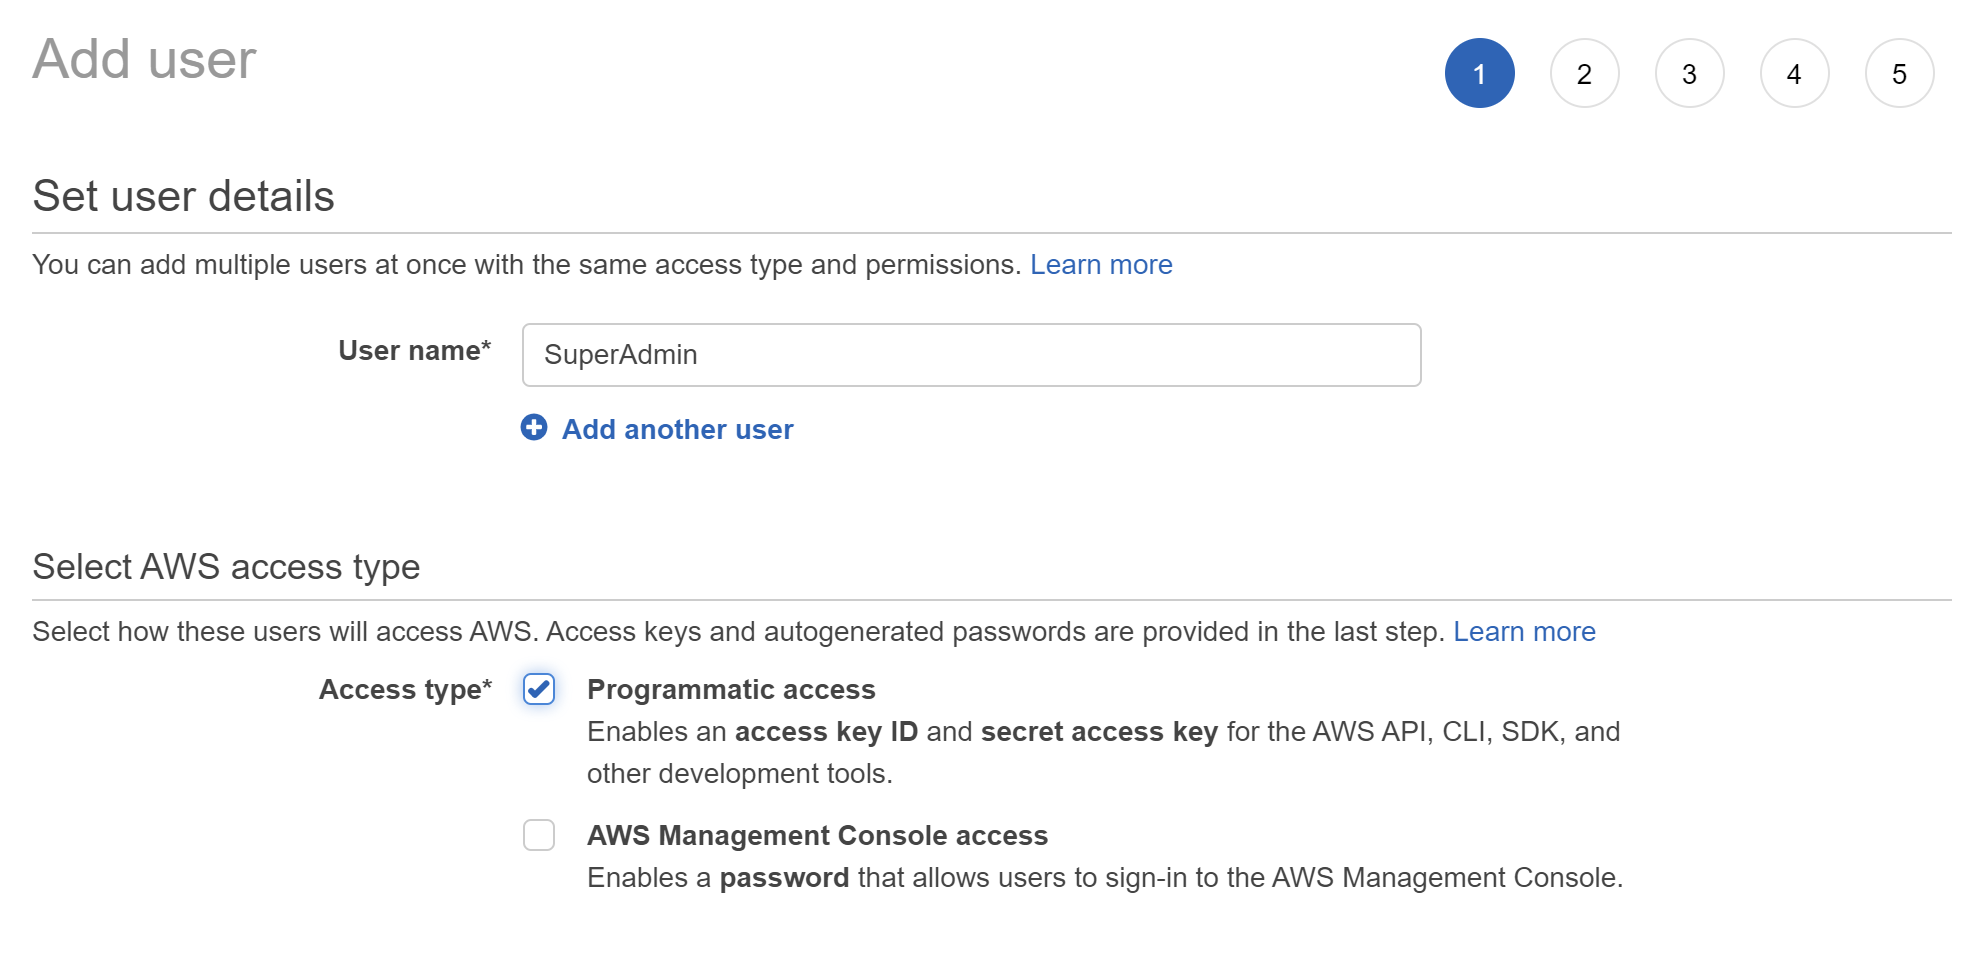
Enter "SuperAdmin" for "User name" and check "Programmatic access" and leave "AWS Management Console access" unchecked. Click "Next: Permissions"
-
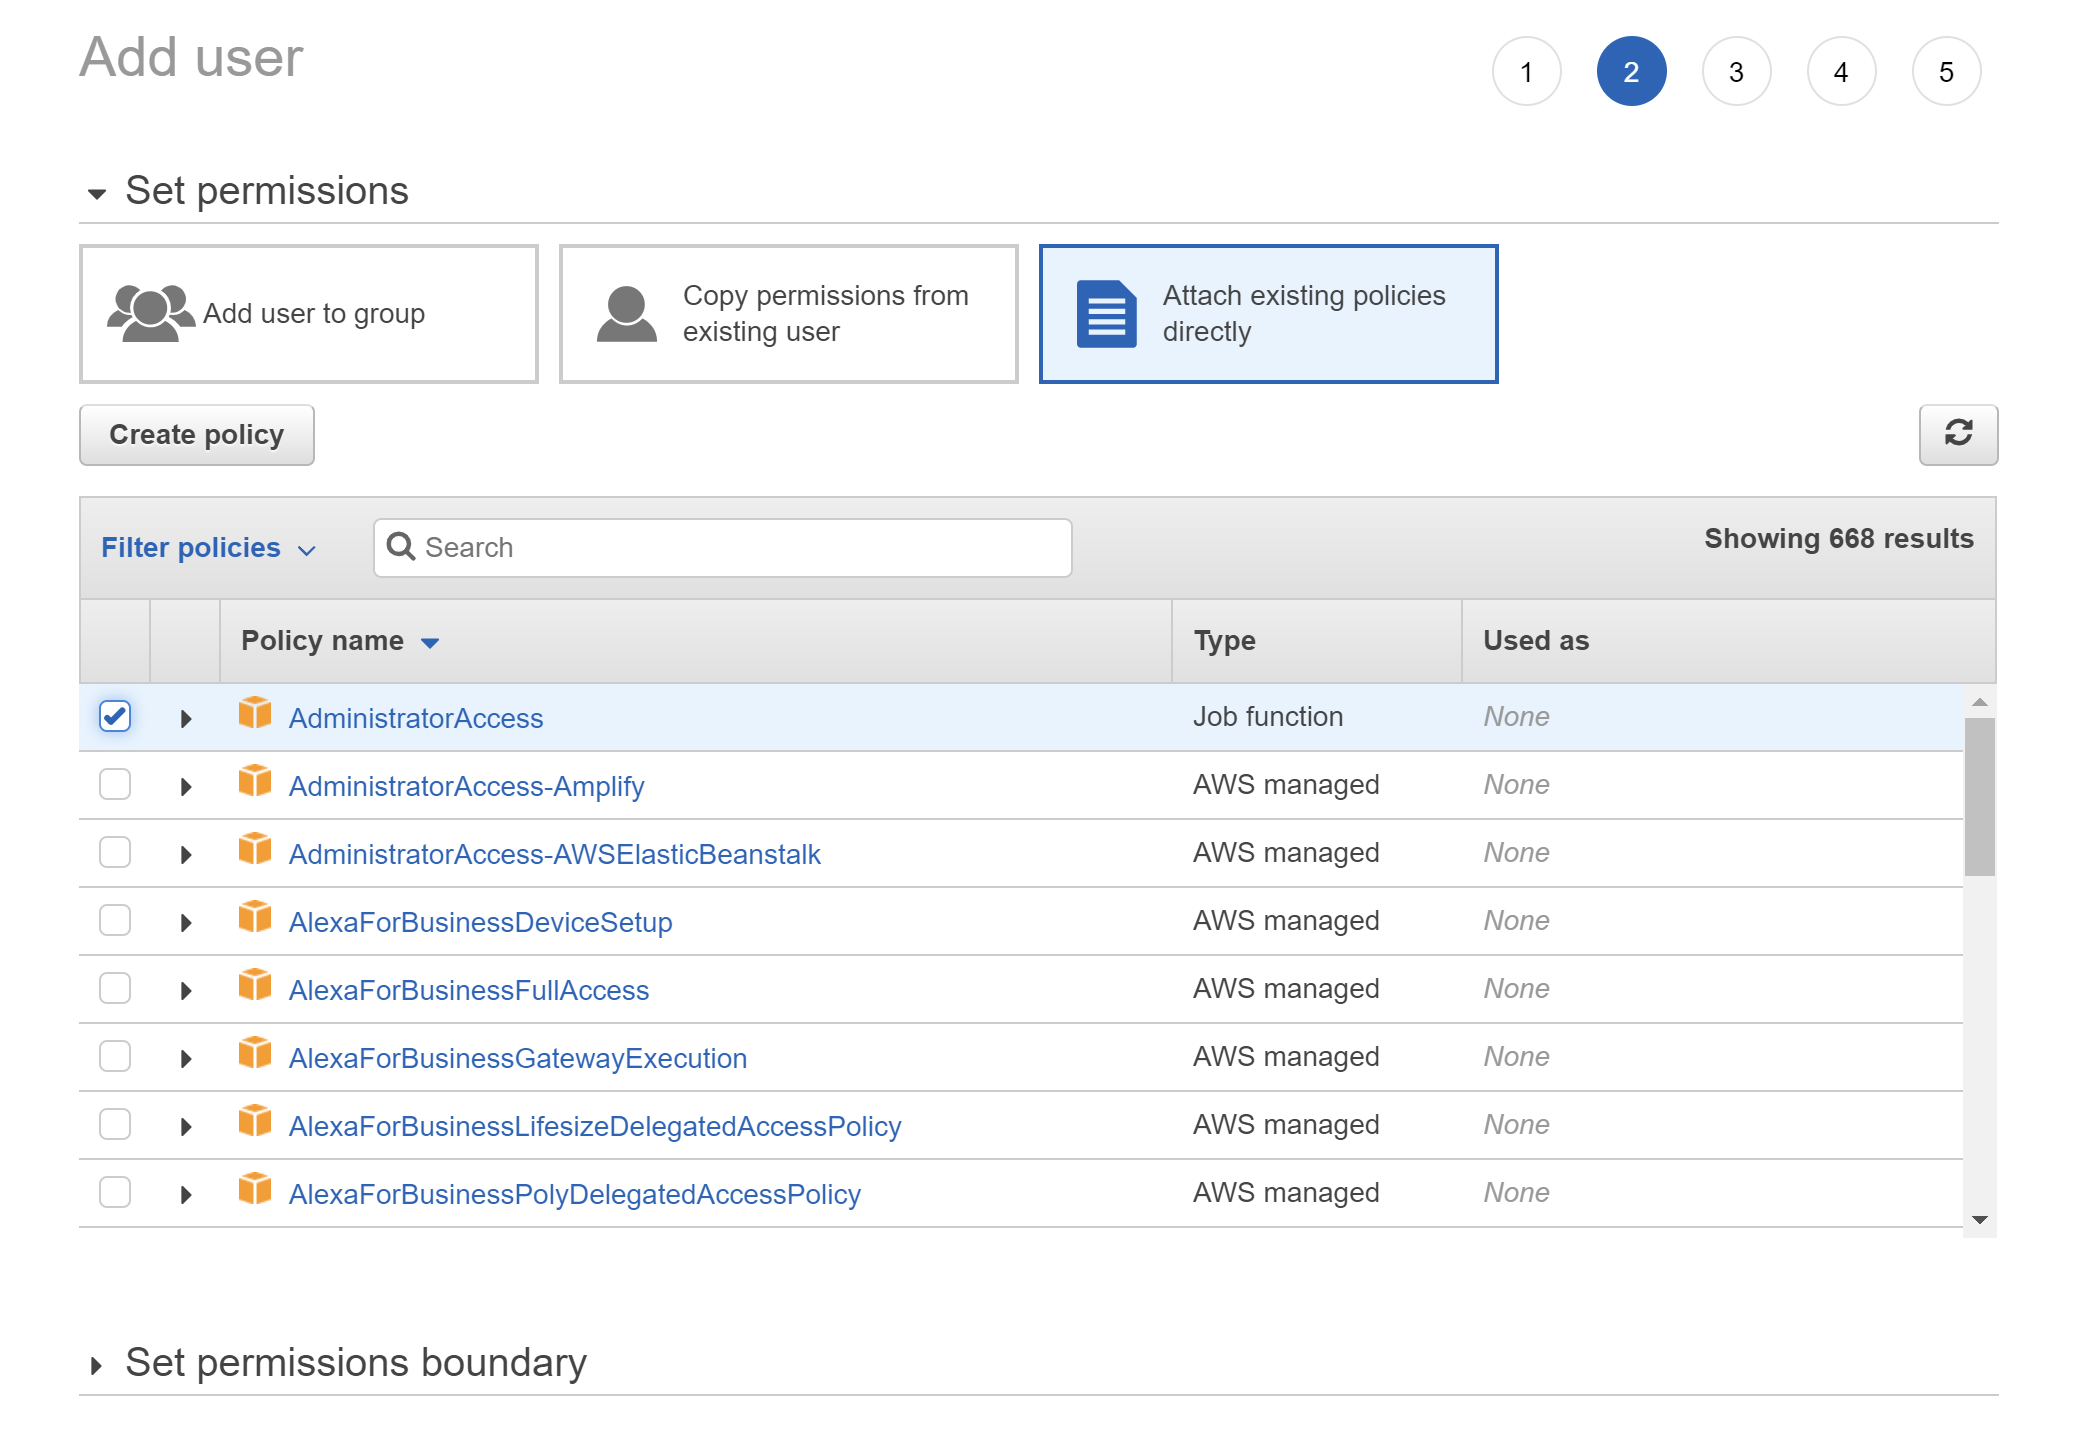
Under "Set permissions", select "Attach existing policies directly". A list should appear, from which you should check "AdministratorAccess". Click "Next: Tags"
-
Skip the tags, Click "Next: Review"
-
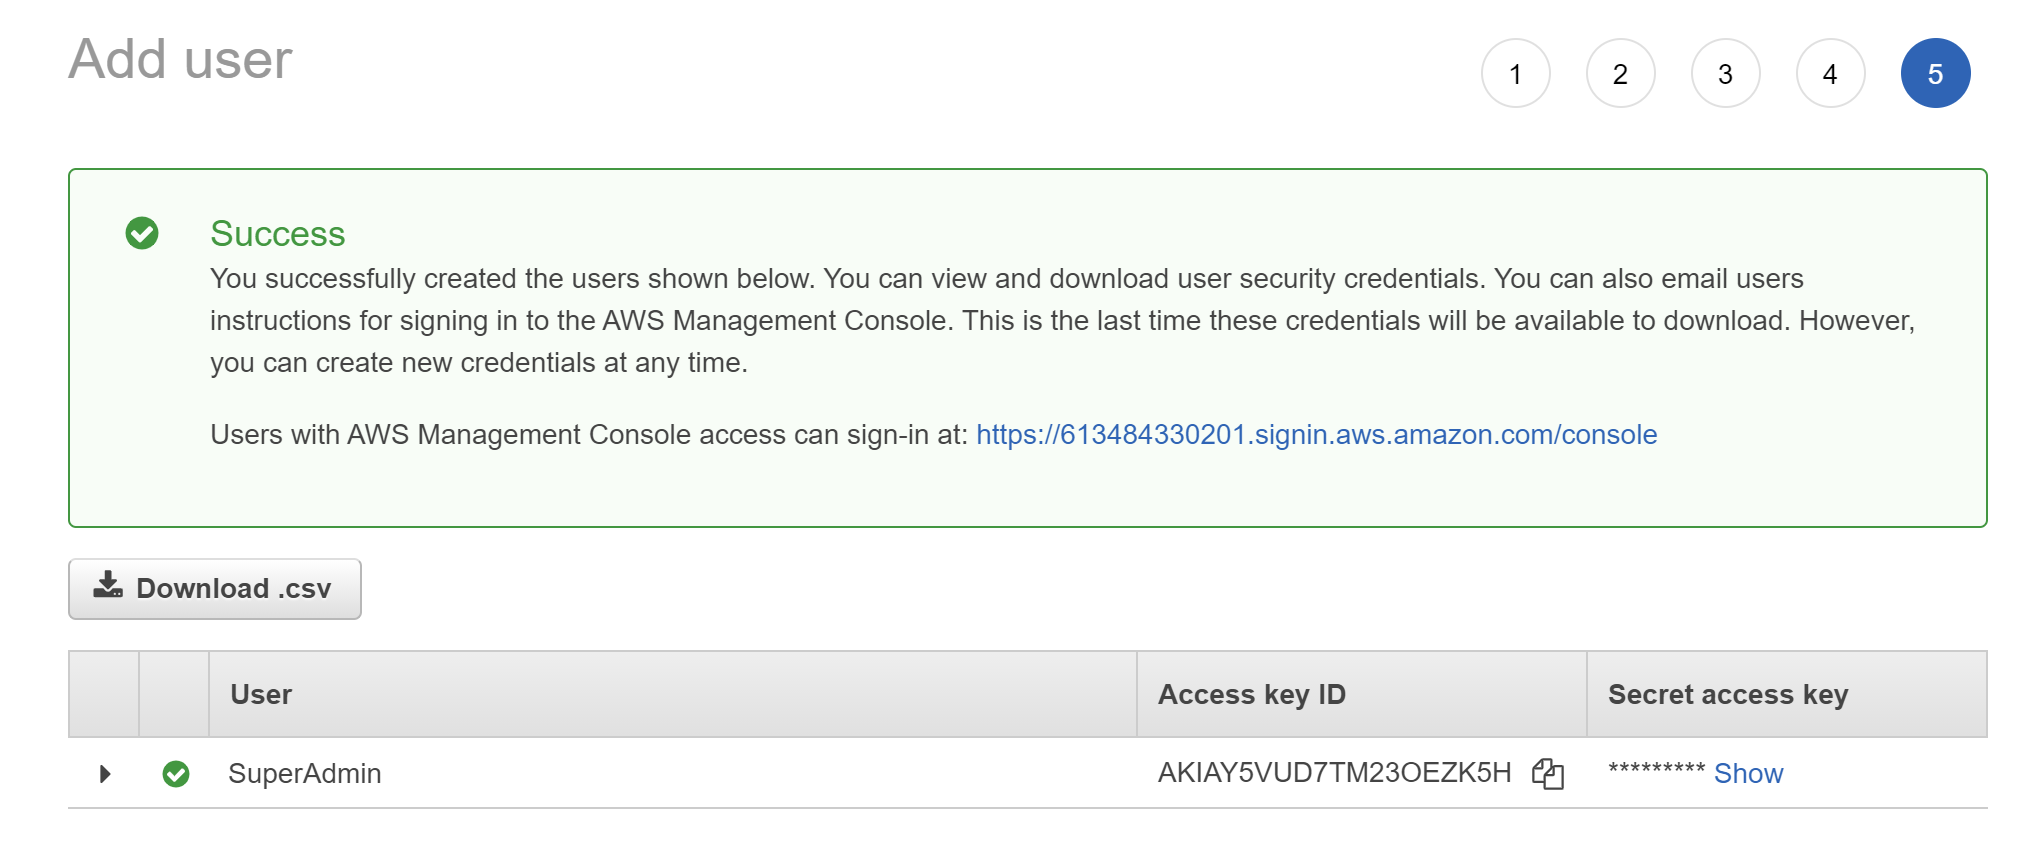
Review and click "Create user"
-
The Success page should show you the "Access key ID" and hidden "Secret access key" which can be revealed by clicking "Show". Copy these to your secure credentials storage as you will need them shortly
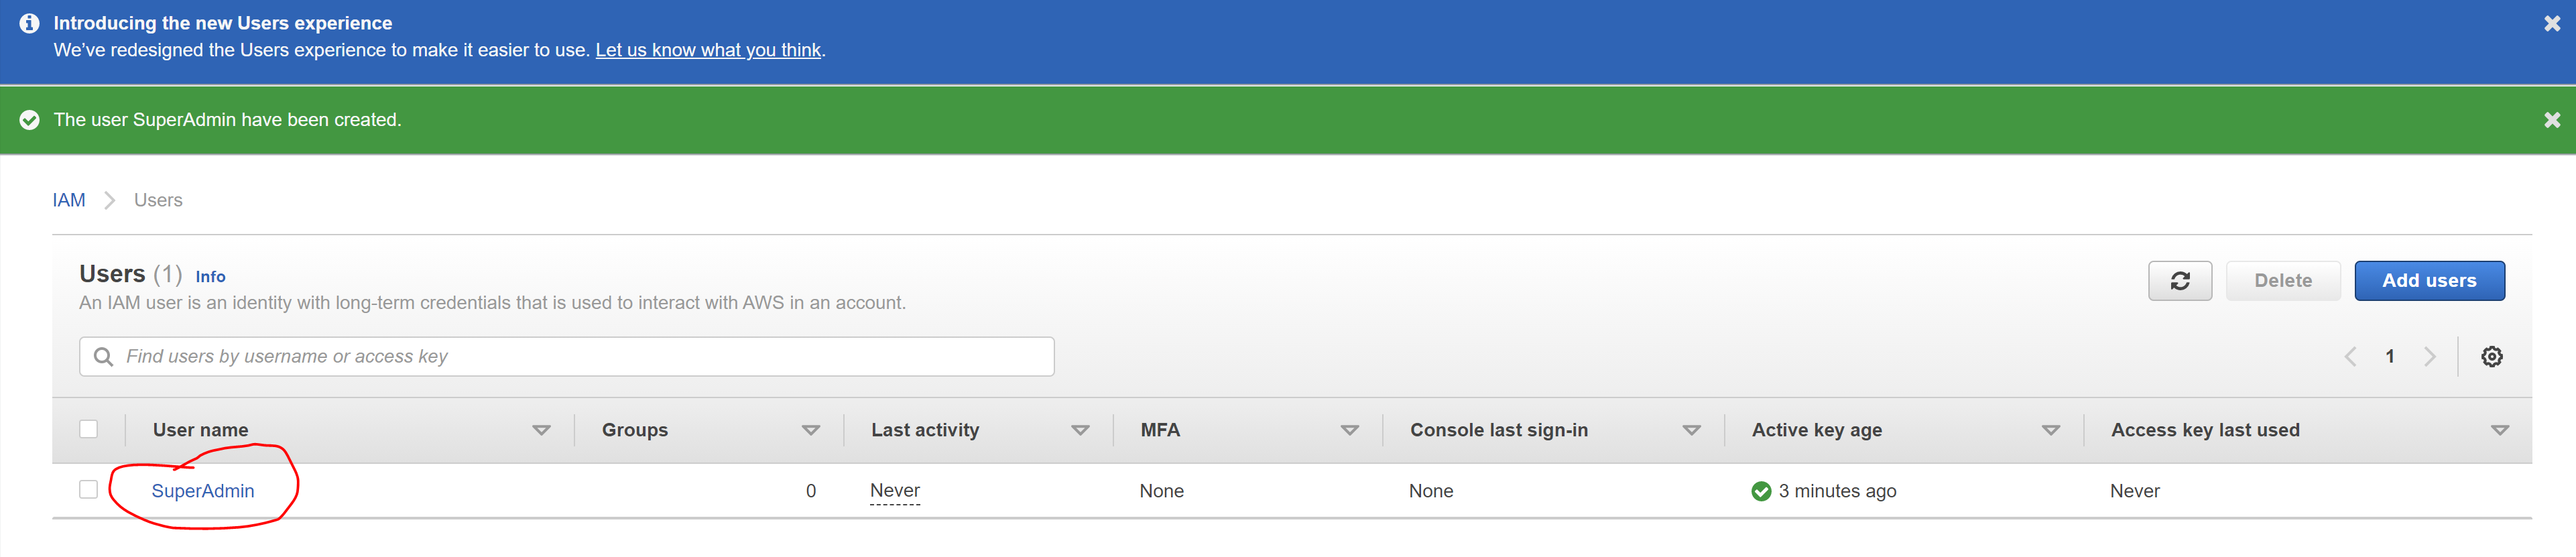
-
Click "Close" to return to the IAM console. Select "Users" on the sidebar if it is not already selected. You should see a list of users. Click the user name "SuperAdmin" (which should be a hyperlink) to take you to the Users -> SuperAdmin "Summary" page
-
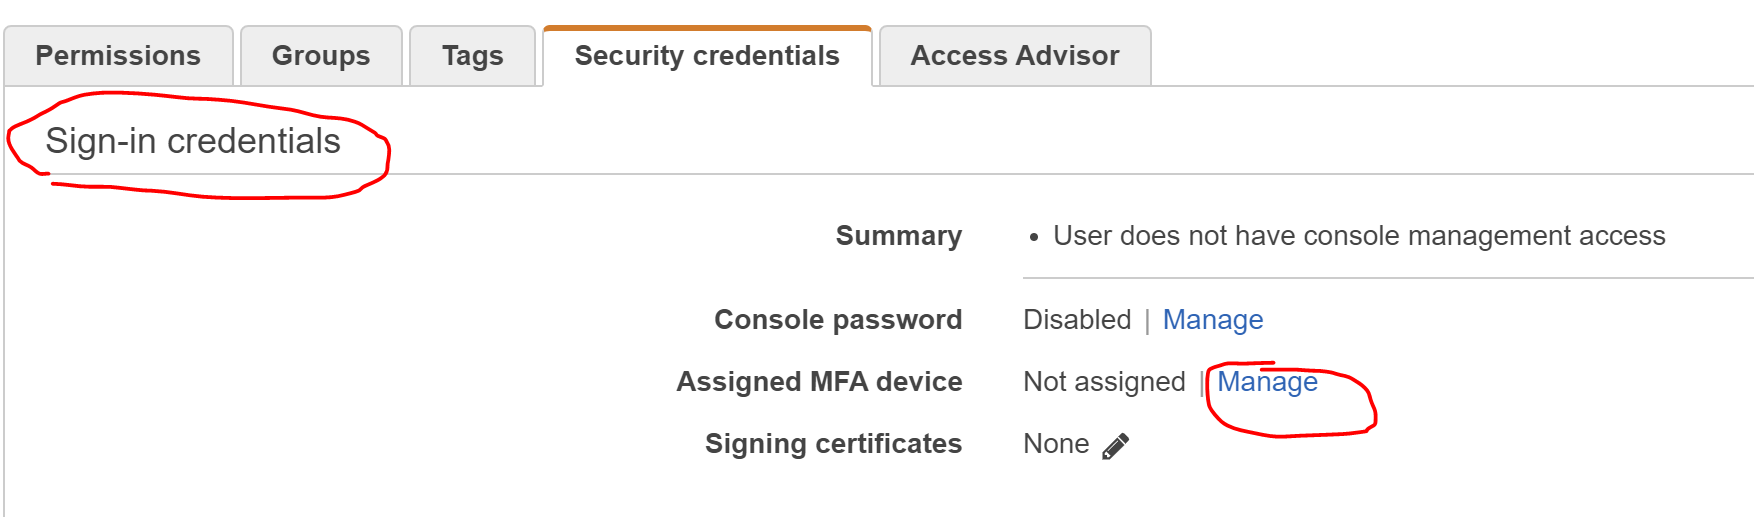
On the "Users -> SuperAdmin" "Summary" page, click on the "Security credentials" tab
-
In the "Sign-in credentials" section, find: "Assigned MFA device: Not assigned | Manage" and click "Manage"
-
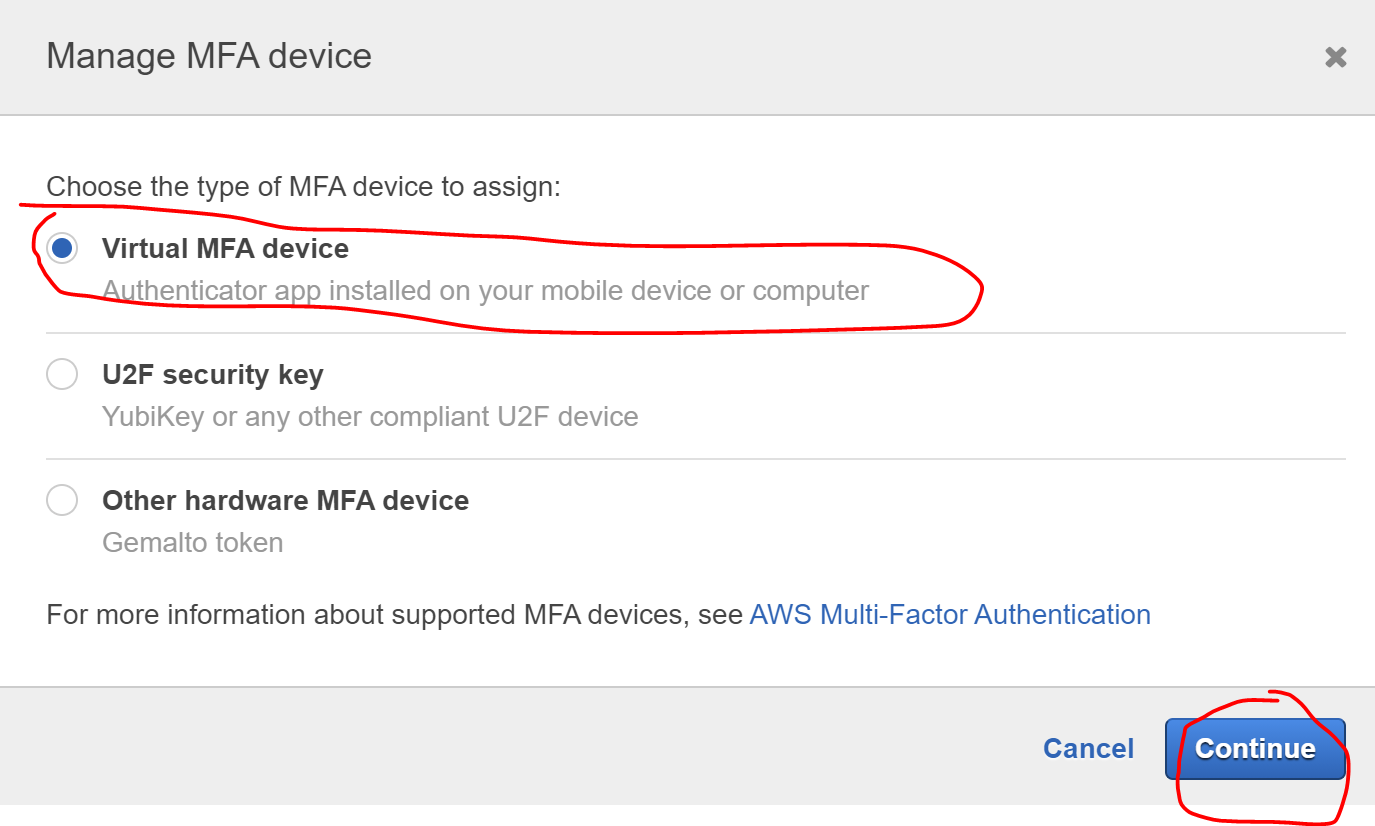
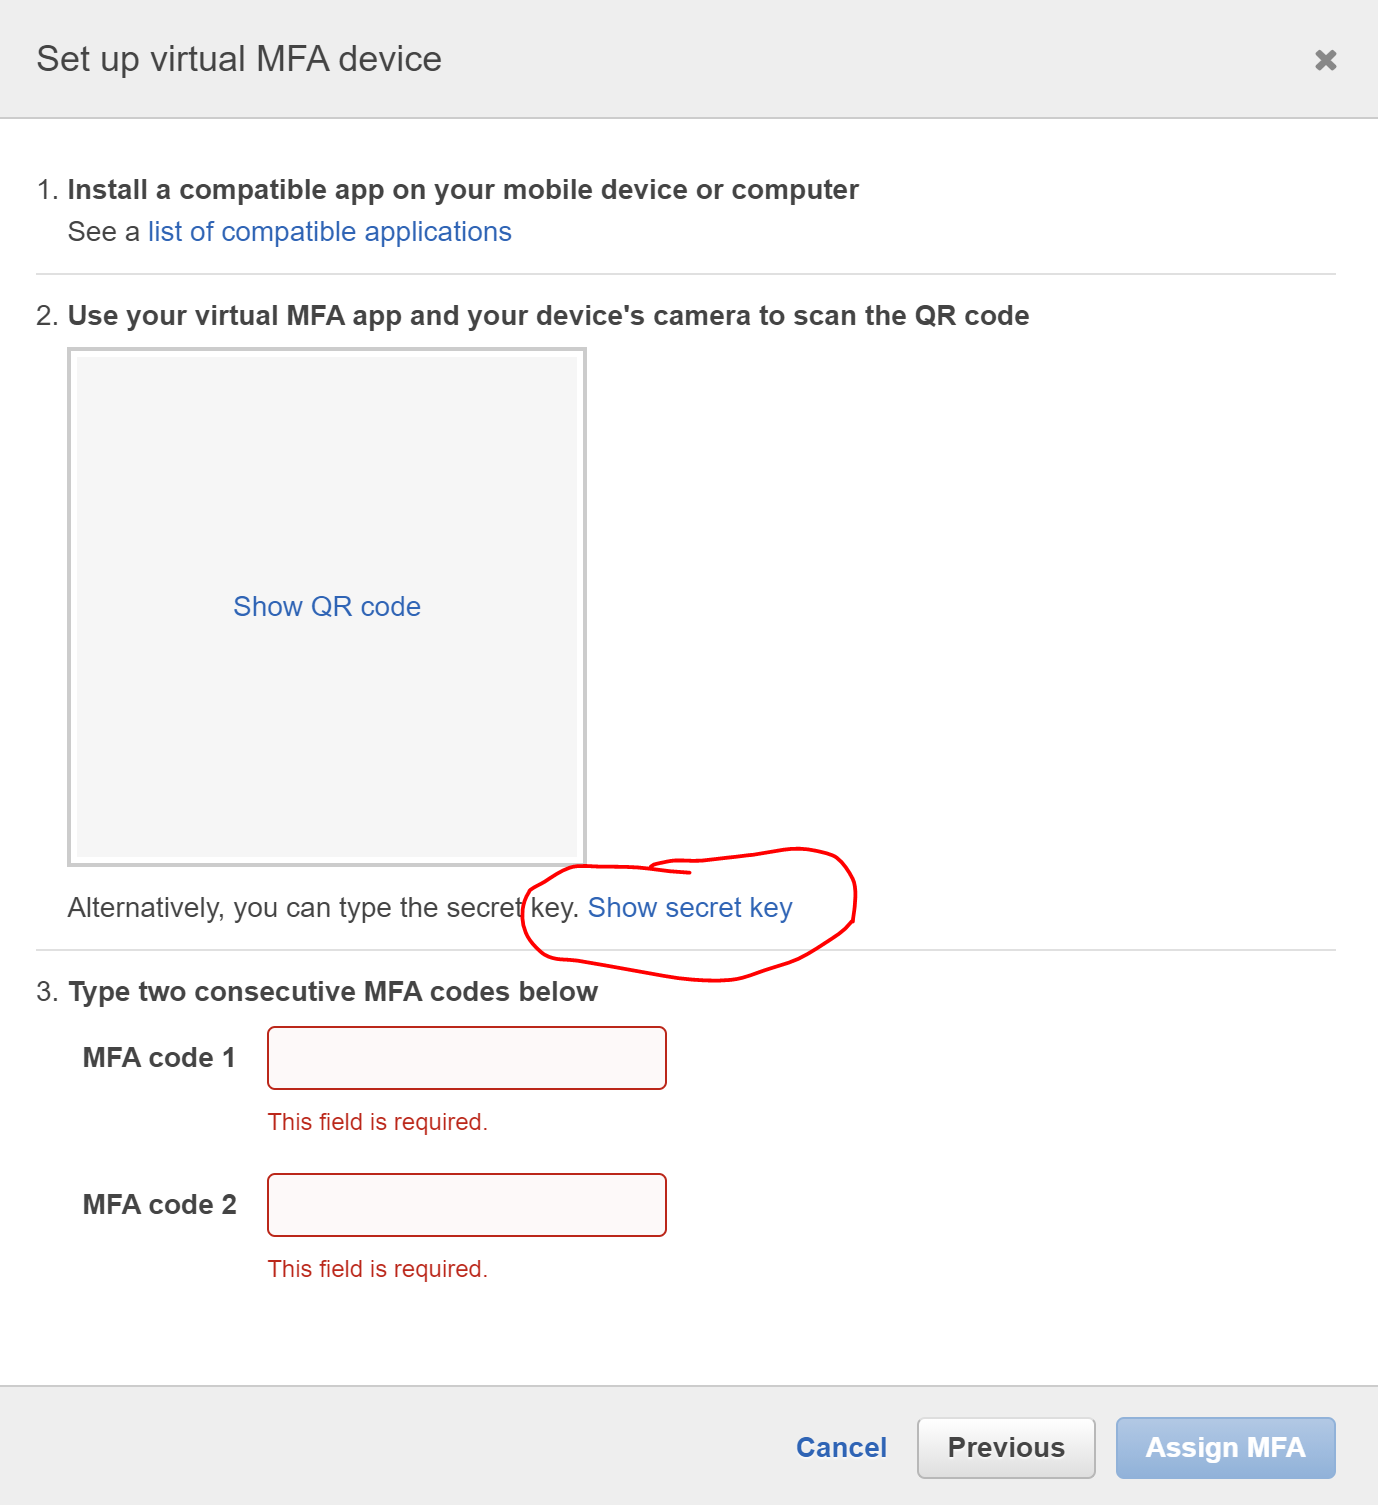
Choose "Virtual MFA device" and click "Continue"
-
Press the "Show secret key" button
-
Copy the key into 1Password as a AWS Credential using the "MFA" field
-
Use the MFA codes from 1Password to complete the MFA setup process (you will input 2 consecutive codes)
-
You should be taken back to the "Security Credentials" tab, but now the "Assigned MFA device" field should have an ARN like
arn:aws:iam::<account-number>:mfa/SuperAdmin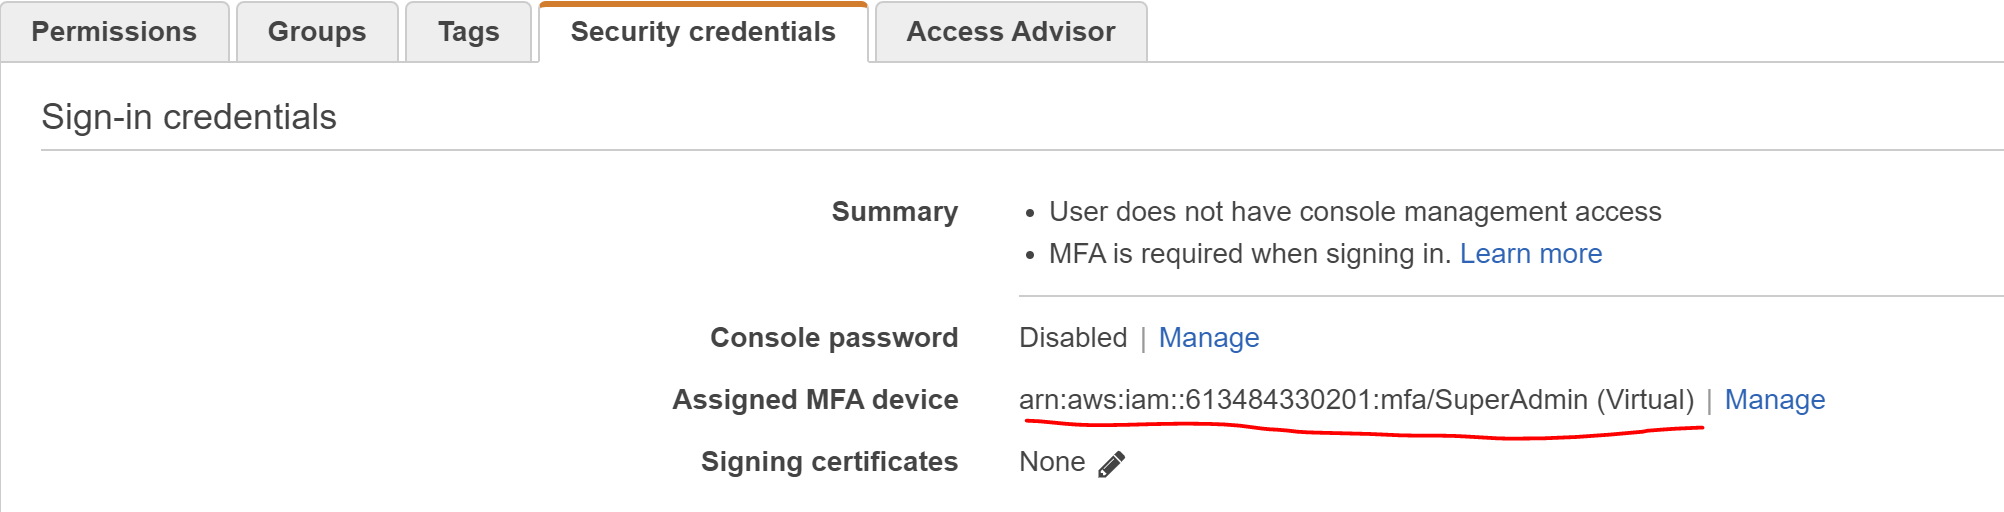
-
Copy the ARN and keep it with the Access Key in 1Password
-
Now we need to create an Access Key for CLI access. Click on the "Create Access Key" under "Access Keys"
-
Select "Command Line Interface" and click the "I understand..." checkbox then click 'Next'
-
Enter a description if you like, such as 'SuperAdmin CLI Access' and click 'Create'
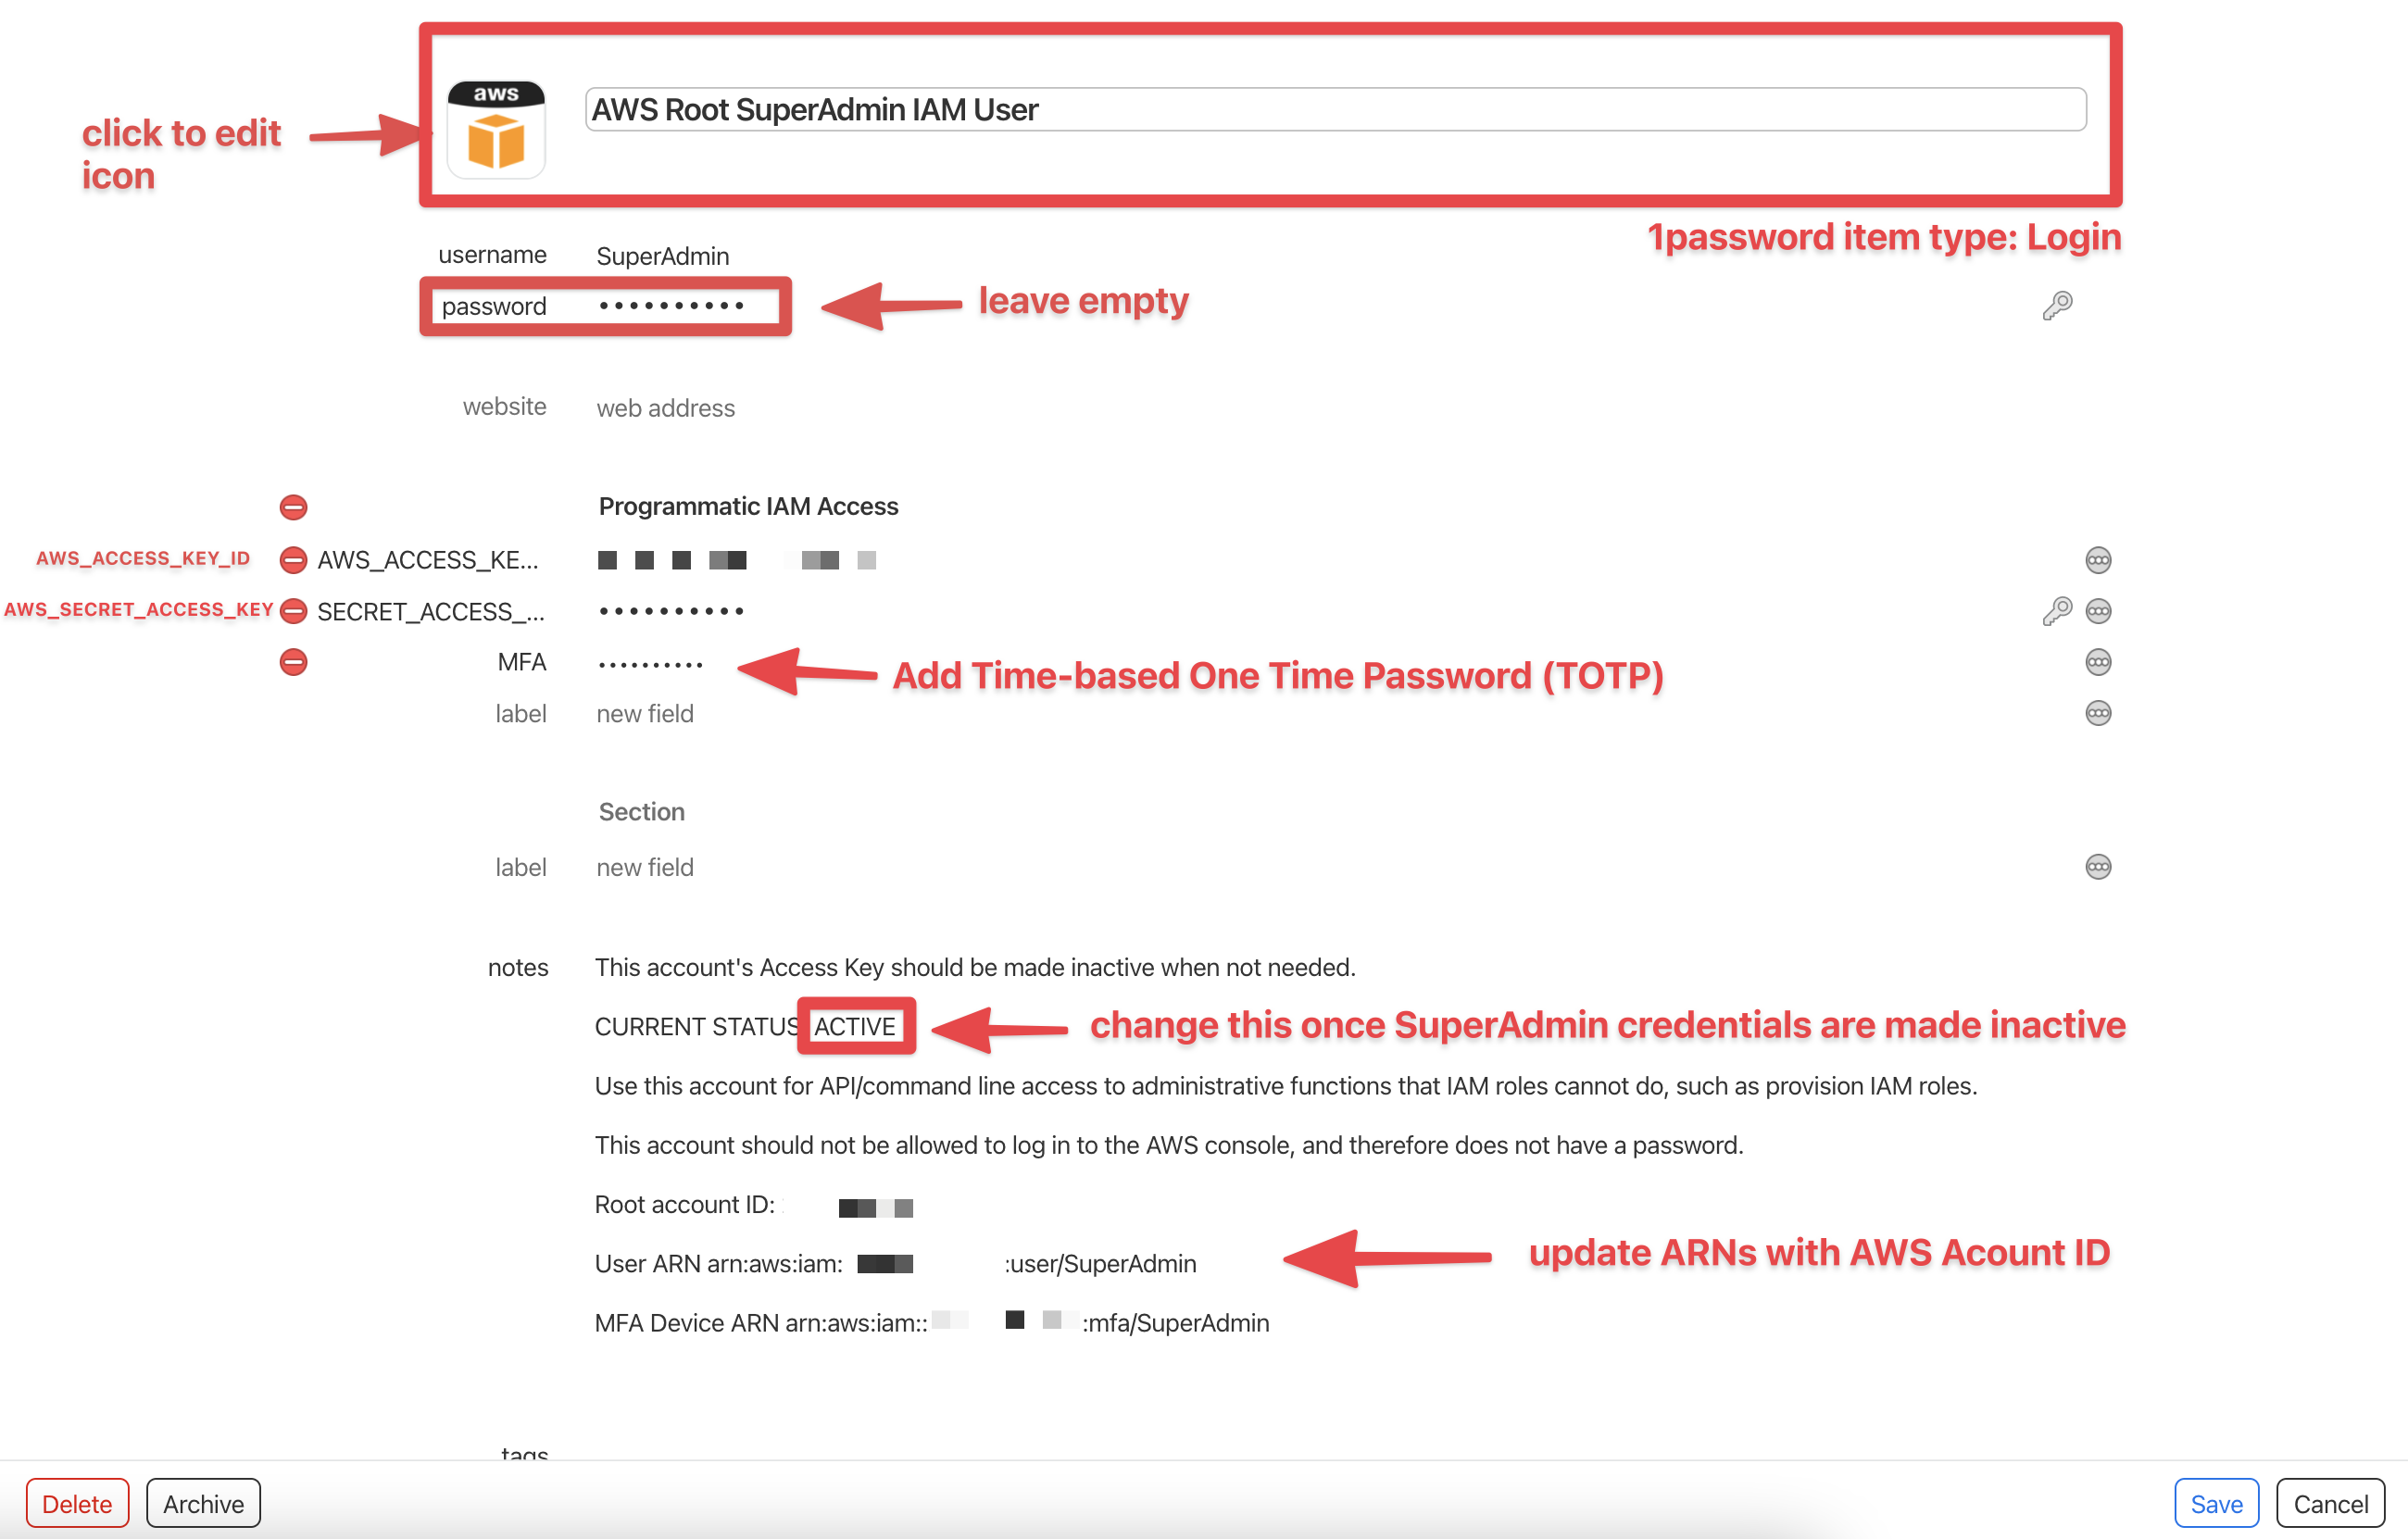
2 Store SuperAdmin Credentials in 1Password
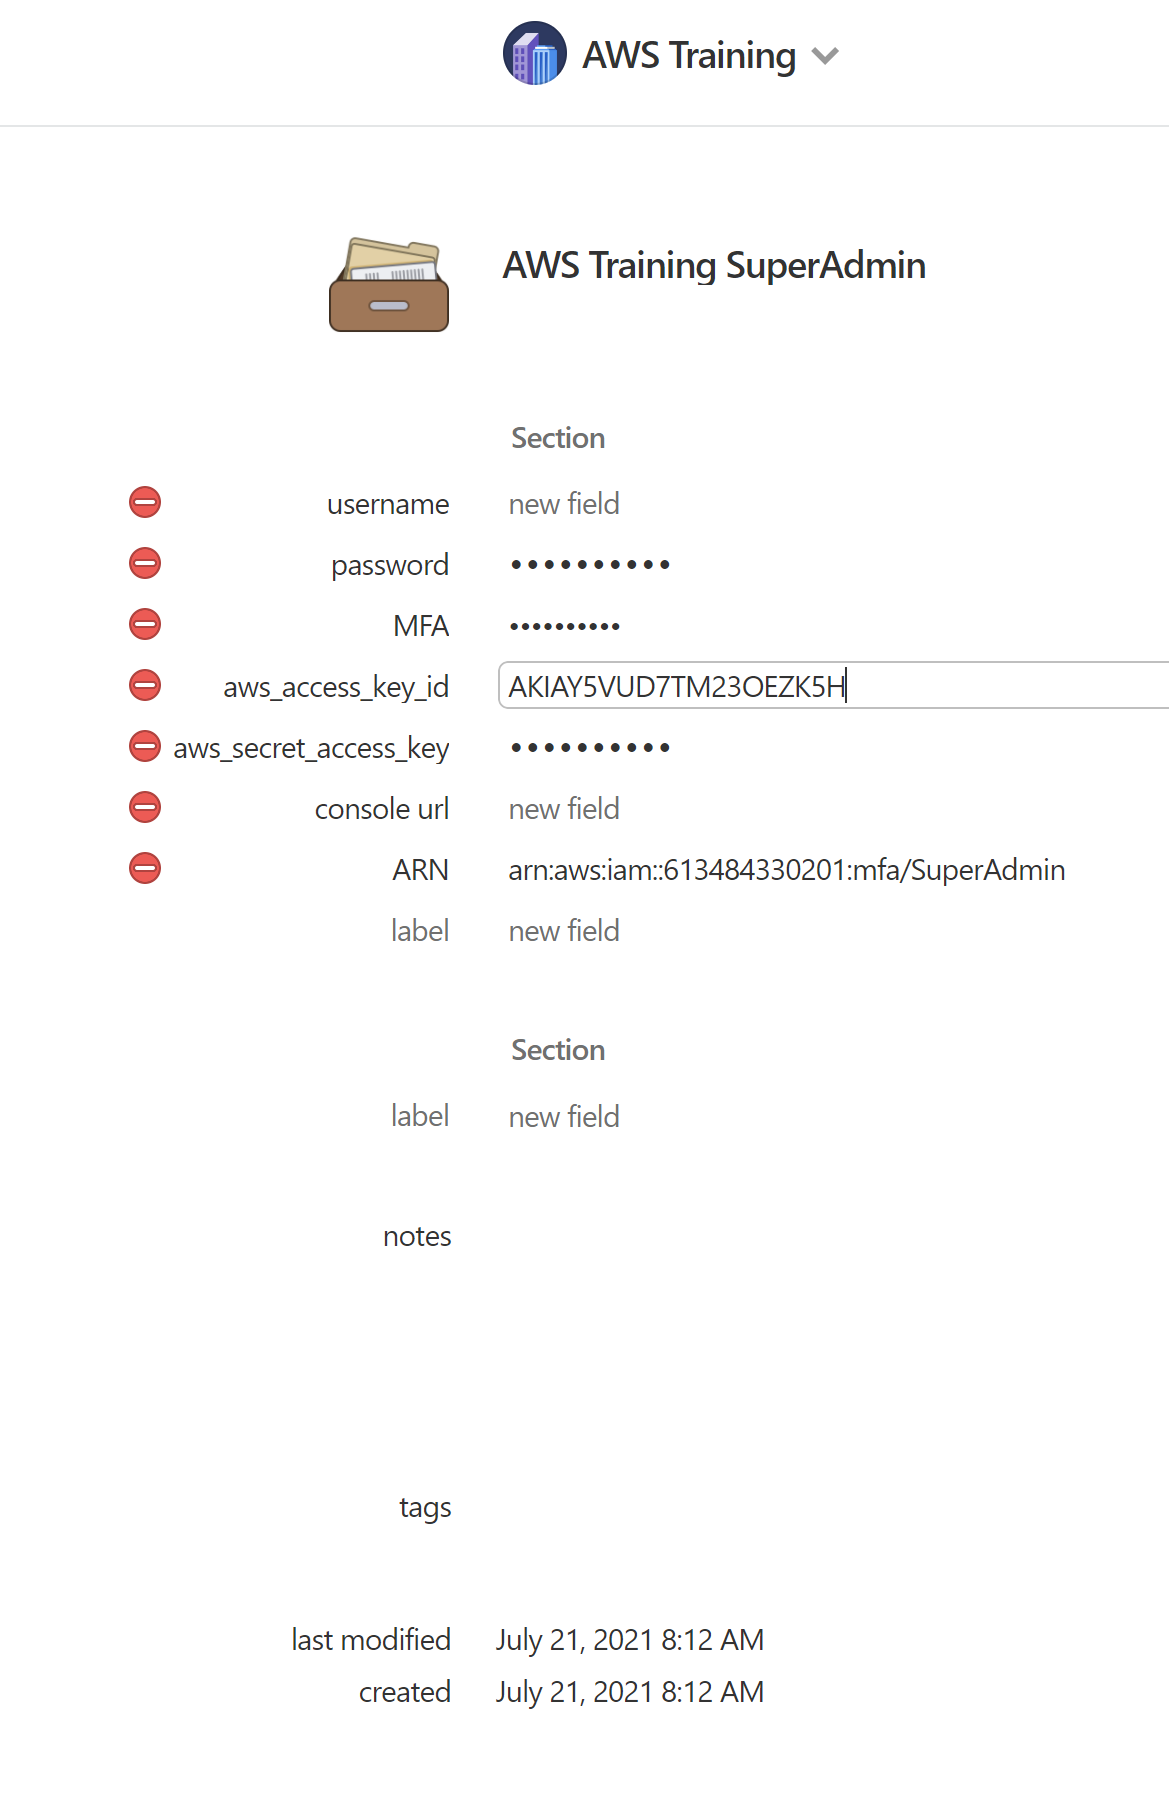
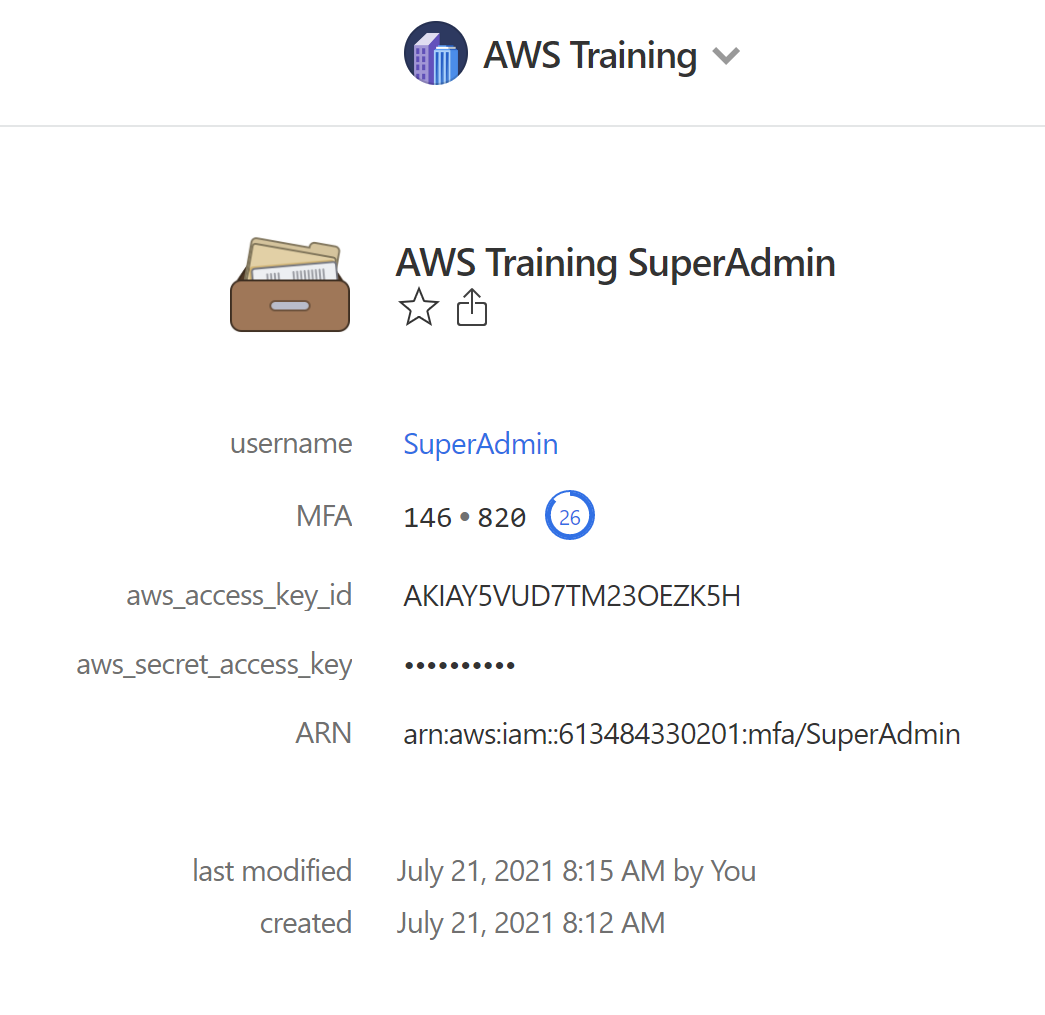
The SuperAdmin credentials should be properly stored in 1Password. Relative to other potential 1Password item types, the most appropriate 1Password item type for these credentials is login. Since these are programmatic credentials and not an actual login with an endpoint from which the website favicon can be retrieved. Additionally, the password field should be kept empty. For convenience in retrieving the TOTP code when using Leapp, save com.leapp.app as a website URL.
-
Set the username to
SuperAdmin -
Create fields for the
AWS_ACCESS_KEY_ID,AWS_SECRET_ACCESS_KEY, and the TOTP (known as One Time Password field type in 1password) via the AWS virtual MFA device's secret -
Add a note in the following format:
This account's Access Key should be made inactive when not needed.

CURRENT STATUS: ACTIVE

Use this account for API/command line access to administrative functions that IAM roles cannot do, such as provision IAM roles.

This account should not be allowed to log in to the AWS console, and therefore does not have a password.

Root account ID: [AWS ACCOUNT ID]

User ARN arn:aws:iam::[AWS ACCOUNT ID]:user/SuperAdmin

MFA Device ARN arn:aws:iam::[AWS ACCOUNT ID]:mfa/SuperAdmin
The resulting entry in 1password should appear as follows:
-
Hit save once you are done. Once the SuperAdmin credentials need to be disabled, do not forget to update the notes in this item
References
REFARCH-73 - Provision SuperAdmin User for Root Level IAM Management