Set Up AWS Email Notifications
Learn how to setup AWS account email notifications by routing emails from AWS accounts to a dedicated Slack channel. It covers using plus addressing for efficient email management and provides detailed steps for creating the Slack channel, generating its email address, and configuring email forwarding.
Make sure to use the email address corresponding to the Decide on Email Address Format for AWS Accounts ADR.
There should exist an [organization]-aws-notifications Slack channel dedicated for emails addressed to the dedicated
AWS address, e.g. aws@[domain]. Cloud Posse recommends using + addressing, such that all AWS accounts will have
their account email set to be aws+[account name]@[domain]. Once emails addressed to aws@[domain] are set up to be
routed to this Slack channel's email address, all emails addressed to any of the AWS accounts' emails will appear in
this channel, thanks to the use of + addressing.
If the use of + addressing is not possible, a dedicated email address such as aws.[account name]@[domain] can be set
up for each AWS account, and a routing rule for each of these addresses to the AWS Notifications Slack channel's email
address can be created.
The following is an example of how to set up this channel and configure email routing to the dedicated Slack channel's email address:
-
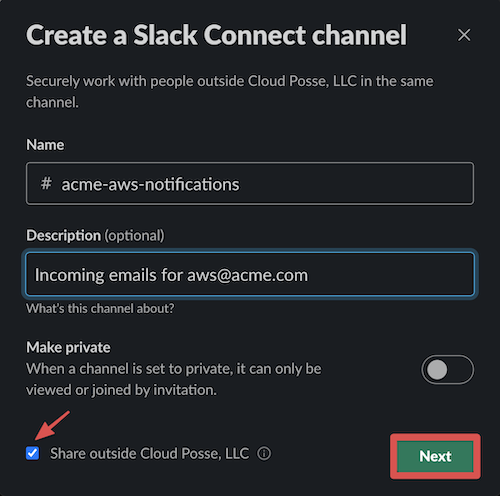
Create the shared Slack channel (under Slack Connect):
(see also: How to Provision Shared Slack Channels )
-
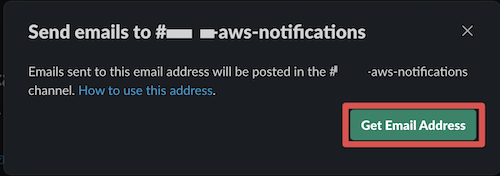
Generate the Slack channel's email address (at the top of the newly-created Slack channel):
-
Set up email forwarding (example: G Suite / Google Workspace)
in
Google Workspace -> Settings for Gmail -> Routing -> Recipient address map: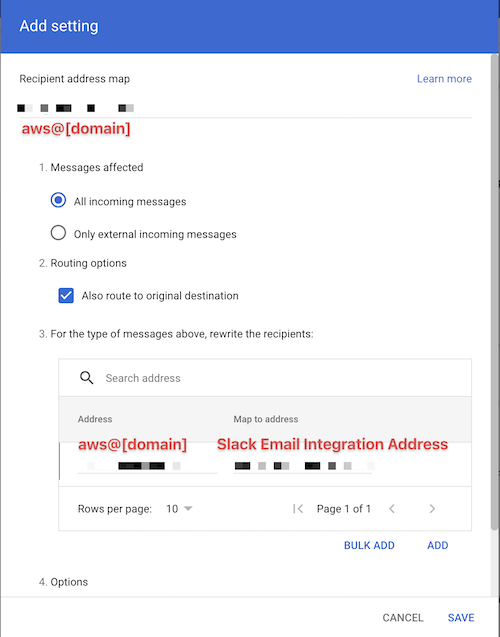
-
Manage Incoming Emails
Depending on your current Slack Workspace permissions, you may need to manage incoming emails for your Slack workspace or organization and allow incoming email