GitHub Feature Branches
The Feature Branch Workflow is a requirement for CI/CD. It's a process by which all feature development takes place in a dedicated branch instead of the master branch. This makes it easy for multiple developers to collaborate on a particular feature while at the same time ensuring that the master branch remains stable."
Problem
When you're working on a project, there will be a bunch of different features or ideas in progress at any given time, not all of which are ready for prime time. Further more, as business priorities change, you might need to prioritize certain features and put others on the back burner.
At the same time, business requirements mandate that you have a stable version that can be deployed at any given time. We know code can never be entirely bug-free. Furthermore, once deployed there can be unintended consequences. Other times, managers simply change their mind and decide that a certain feature was premature or unnecessary. To mitigate the impact of these events, we need the ability to rollback a feature or cut-bait.
TL;DR: If everyone is working on the same branch such as master, it pollutes the commit history making it all but impossible to figure out which commits relate to specific features making rollbacks impossible.
Solution
To solve this problem, the standard workflow called branching should be used religiously. Any time a new feature is developed it must be worked on in a separate branch. When you create a branch, you're creating an environment where you can freely test out new ideas without impacting others because changes made on a branch don't affect the master branch (or any other one).
Furthermore, no two developers should ever commit to or work on the same branch at the same time (unless they have permission from the branch stakeholder). Instead, they should create a new branch.
The next thing that needs to happen is that the master branch is treated as the Holy Grail. Every effort is made to ensure it's stable and can be deployed to production at any time.
Once a feature is considered ready, the developer submits a Pull Request (or PR) and assigns it to a Subject Matter Expert (SME) or peer for review.
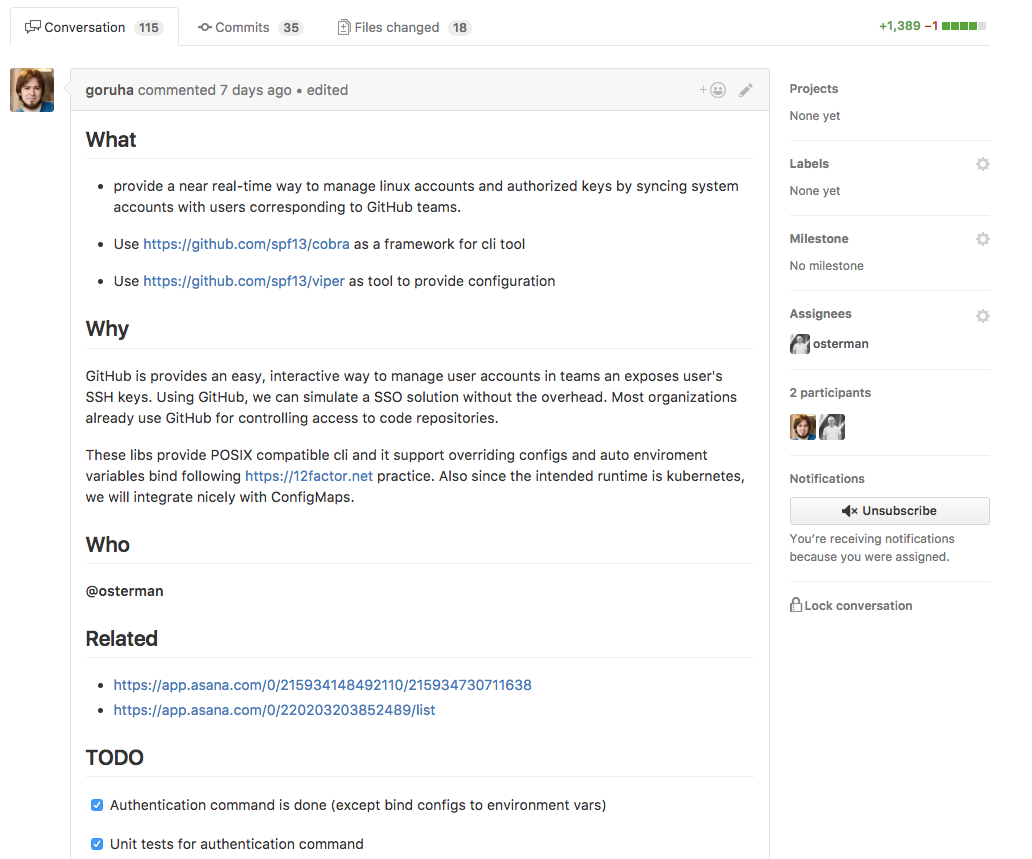
On the surface, this is what a well-formatted Pull Request looks like: 
A Pull Request allows many things to happen:
- Title: A "human readable" title that represents the feature!

- Description: A long description that details What was changed, Why it was deemed necessary, and any other References that might be useful (E.g. Jira ticket)
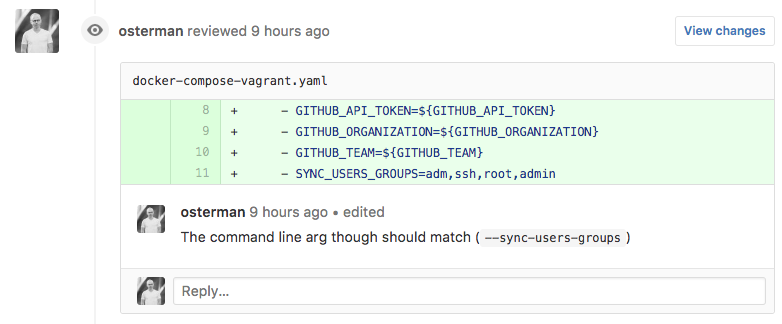
- Comments: let anyone provide arbitrary feedback viewable by everyone.
- Diffs: show what changed between this feature and the current master branch
- Formal Code Review Process: let multiple people contribute to the code review process by submitting comments on a line-by-line basis. Having these code reviews formally documented serves as an excellent teaching tool. Over time, the reviews become faster and faster as developers learn what is expected.

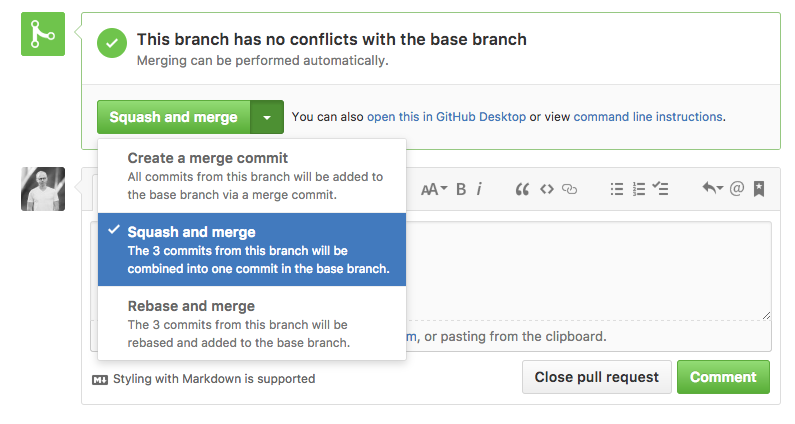
- Merging: Once the PR is approved, the developer can squash and merge their code into the master branch. Squashing allows the master branch to have a very clean commit history where every commit corresponds to a PR.

- Clean Commit History: means that every change to the master branch is documented and justified. No one is sneaking in changes.

- History of Features and when they were added

- Reverting: If a feature needs to be removed, with the click of a single button it can be removed from the
masterbranch
Technical Details
Create a Branch
Whenever you begin work on a new feature or bugfix, it's important that you create a new branch. Not only is it proper git workflow, but it also keeps your changes organized and separated from the master branch so that you can easily submit and manage multiple pull requests for every task you complete.
To create a new branch and start working on it:
# Checkout the master branch - you want your new branch to come from master
git checkout master

# Pull down the latest changes
git pull origin master

# Create a new branch, with a descriptive name  (e.g. implement-xyz-widget)
git checkout -b newfeature
Now, go to town hacking away. When you're ready, push the changes up to the origin.
git push origin newfeature
Now check out how to create Pull Requests!